On the positive side there were some very successful moments. Successful outcomes of baking and cooking efforts that got highlighted by others too. It keeps one going, knowing that your humble efforts are seen by others in cyberspace after all.
Then things happen. Call it Karma if you will. Or an Angel looking after you. You get noticed by others who may find your skills useful in their world. And so it was for me, being part of the birth of a restaurant. A bistro, actually. Complete with a bakery.
A friend opened a new bistro and bakery. I was asked to help with the bakery. What a privilege! My meager skills were becoming useful!
 |
| The start: Multi-grain mix with the sourdough |
Time for proper baking.
This time it was for real and we decided on a multi-grain sourdough loaf. I baked this before at home, so we reasoned that the risk of getting it all wrong was low. The original recipe is from Peter Reinhardt's book The Bread Baker's Apprentice. A very useful reference to have on hand. Again, in this case, as you will see shortly. I used a variation of the original recipe for baking at home, about which I wrote a blog post recently.
Of course, doing the same thing on a larger scale is simply not possible. Triple the quantities of ingredients and there will be something not quite in the right ratio. The dough will be too dry or not salt enough. Or some such thing. Luckily we were aware of this and checked every now and then as the work progressed.
 |
| A proper mixer |
Enter Peter Reinhardt's book. The book gives quantities in bakers terms. Percentages of the main ingredient. Percentages are scalable, so it was a cinch to get the right ratios.
Or so we thought. You need to read the book very carefully. Peter Reinhardt also says in the book to check every now and then too see if the dough is elastic enough and has the right taste. Which is what saved this batch of bread.
For a start, we deviated from the recipe by using existing sourdough from the refrigerator. No soaker. So we were left with a problem of getting more flavour out of the multigrain part. We got past this by using warm water. The next part of using our own initiative came when the dough was mixed and found too dry and brittle. Which meant too little gluten. So more flour was added, which made the dough much drier. This required more water.
 |
| Not your home style bread pans |
We also found that the different types of flour had different moisture content. The flour used was stone ground full grain flour. Another difference. This probably had the biggest effect on the water quantities. I get the idea that the full grain flour is heavier and soaks up much more water than other flour. Something to be aware of. Of course, this is South Africa and the flour will differ in cultivar of wheat too. Another major difference.
We found this out with maize flour in Mexico. The coarse maize flour available in South Africa makes the most amazing maize porridge, but is useless for making tortillas. In turn, the maize flour sold in Mexico for making tortillas is useless for making South African style porridge. Believe me, we tried. And failed. Several times, in fact. In the end we just accepted the fact that we shall not be eating the crumbly style mieliepap with our steaks from the braai while in Mexico.
 |
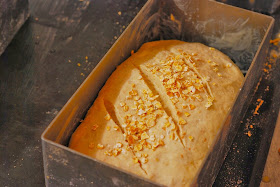
| Going into the prover. Garnished and cut |
Eventually we decided the dough was ready. The blob of around 6 kg was left on the table to rest, covered with a plastic sheet against drying out. As can be expected from a sourdough, the first proofing took quite a while. The coarse multigrain mix also has an effect, no cause for alarm if things go slow in the beginning. The dough doubled in volume before it was divided into blobs of around 700g for the second proofing.
Here I learnt another trick of the trade. Take the blob of dough in both hands and fold it into itself using both thumbs. This has the effect that the side away from your thumbs get stretched, making for a nice looking loaf. The seam on your thumbs' side gets to be squashed together nicely and goes on the bottom of the loaf. We decided on putting the garnish of rolled oats on before the final proofing, along with the requisite cuts on the top.
The tops of the loaves are cut to help with even rising. Else you may get oddly shaped loaves. The proofing went fine. Having controlled temperature and humidity makes a huge difference in the process. So does having a proper industrial oven with controlled air flow. This translates to even temperature everywhere in the oven. So all the loaves bake at the same temperature, irrespective of where they are in the oven.
 |
| Bistro style: Checking taste and texture |
The results were outstanding. A crisp and chewy crust with a wonderfully soft crumb. The bread had a distinct after taste of sourness coming through, with the crumb getting sweeter as you chewed. A wonderful result indeed.
 |
| Real bread, artisan style |
For me, a new perspective on baking. Don't follow blindly, think for yourself. The results are your responsibility, not someone else's. And don't let your fears stand in the way of a culinary adventure.
More of life's small lessons, I guess.
This blog post also linked to Yeastspotting!
Authored by Johan Zietsman
Last updated on 2014-03-21


Baie lekker!
ReplyDeleteWell done! I have also baked sourdough breads around the world. The key is that the dough ball has to look and feel right :-)
ReplyDeleteExcactly. Thanks John!
Delete